 Running Basilisk II emulator for the first time
|
This howto article assumes you know how to unzip a .zip file and do basic Windows tasks like create folders. I'm running Windows 7 Home Premium, but this howto should work fine on Win 8 and Win 10. Download the 2015-02-26 build of Basilisk II (BasiliskII--2015-02-26----68k-color-emulator-with-floppy-support.zip) from Macintosh Repository (MR). Create a new folder on your Windows hard drive called "basilisk_playground". This is where you will run and manage Basilisk.
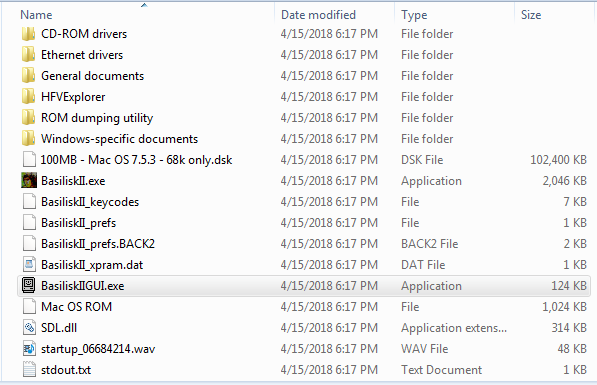
Unzip the contents of the .zip file to the basilisk_playground folder.
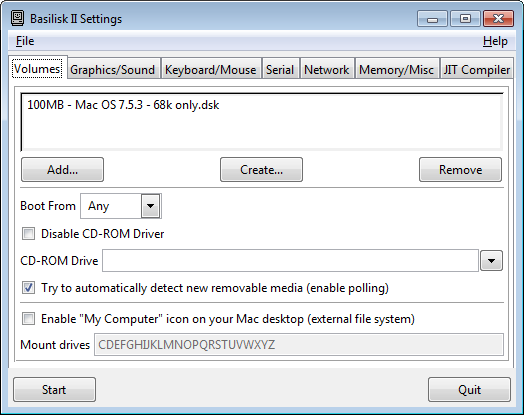
Install GTK+ for Windows (gtk+-2.10.13-setup.exe). Newer versions of gtk may not work well with Basilisk. Search MR: gtk+ for basilisk windows Run BasiliskIIGUI.exe (I will call it "BasiliskGUI" henceforth). The app will look like this, which is the settings GUI:
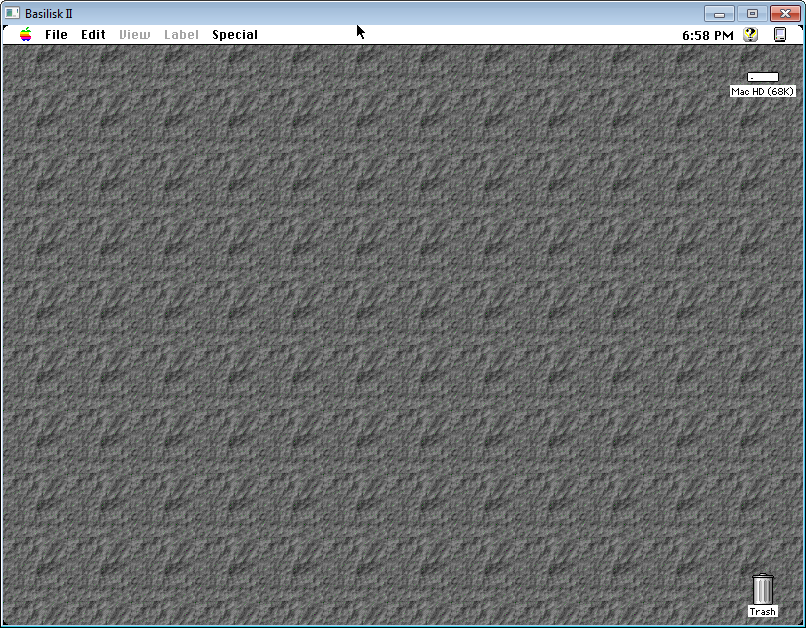
If you are using the Basilisk .zip from MR, you should not have to change any of Basilisk's settings to run the default emulated Mac. Click "Start". This will boot a emulated Mac running System 7.5.3. After a few seconds, you should see a familiar Mac desktop with one hard drive mounted.
When you want to do more with Basilisk, the Volumes and Memory/Misc tabs of BasiliskGUI will be useful. The Volumes tab allows you to mount ("Add") disk image files as disk drives on your emulated Mac, such as images found on the Internet containing games/apps. Disk image files usually have the extension .dsk or .hfv and vary in size from 400K, 800K, 1440K floppies to 10MB, 200MB, and larger hard drives. You can download blank disk images too (or make your own with HFVExplorer) and use your emulated Mac to copy files to/from those blank disks. After you shutdown the emulated Mac, the previously blank disk (a disk image file in Windows) will contain the files you copied to it. The Memory/Misc tab allows you to try other Mac machine ROM files and "instantly" upgrade the RAM by increasing the RAM "seen" by the emulated Mac. You'll have to find and download ROMs or create a rom file from a real Mac machine. Search MR for "all macintosh roms". The bootable hard disk image included in the Basilisk .zip on MR has Stuffit Expander 5.5 pre-installed, which should "unstuff" (decompress/expand) most of the games/apps found on MR (those that you would download as .sit files). Note: I was not able to unstuff some .sit files using Stuffit Expander 5.5, and in these cases, I used Stuffit DELUXE 5.5 successfully (to install Deluxe 5.5, I unstuffed the Deluxe 5.5 .sit file with Expander 5.5). I'm not sure why this happened (all emulation & .sit files were downloaded from MR), but Stuffit Deluxe 5.5 worked great and I haven't looked back. The Stuffit Deluxe 5.5 Installer requires a Mac with 16MB of RAM, so be sure to configure 16MB or more in BasiliskGUI ("Memory/Misc" tab) before your next reboot. There are at least two ways to copy a .sit file to the hard disk image so your emulated Mac can unstuff and run the app inside: 1) Use HFVExplorer for Windows to copy the .sit file to your disk image. This is completely done in Windows. The emulated Mac is not involved, except to boot the updated disk image. or 2) Enable the "My Computer" icon in Basilisk, which mounts your Windows disks inside the emulated Mac. The using your emulated Mac, just drag files to copy them to destination folders. The following explains how to enable the "My Computer" icon in Basilisk. Start BasiliskGUI and in the Volumes tab, tick the checkbox: Enable "My Computer" icon on your Mac desktop (external file system).
By default all Windows disks C: through Z: are selected, which is overkill when you have multiple Windows disks like I do. I'm just going to mount C: ("C") as shown in the screenshot. Click "Start" to save the config and boot the emulated Mac. After the Mac desktop appears, the new "Computer" icon will allow you to navigate to any folder on your Windows drive(s) and copy files to/from Windows to your emulated Mac's hard disk.
Of course, it makes sense to copy files that the Mac can understand, and usually these will be .sit files you want to unstuff on the Mac with Stuffit. On the emulated Mac, copy the .sit file by dragging it from the folder within "Computer" to the Mac's hard disk (or folder within the hard disk). To unstuff a .sit file, simply drag the .sit file onto the Stuffit Expander 5.5 icon. Alternatively, you can run Stuffit Expander and use the "File" menu item to open/expand the .sit file. Here's a screenshot of me dragging the Stuffit Deluxe 5.5 .sit file onto Stuffit Expander 5.5:
After unstuffing is done, check the folder containing the .sit for a new folder containing the unstuffed app/game. The typical behavior of Stuffit is to unstuff to the same folder that contains the .sit file, though this behavior can be changed in Stuffit's settings. Now you can run the app! Have fun, fluf
|
|


