How to share an USB stick between a PowerPC (G3, G4, G5) Mac and Windows?
|
The issue Got yourself an old PowerPC Mac with USB ports and would like to download files from MR on a Windows PC then copy those files to an USB stick and onto the old PowerPC Mac but the USB stick doesn't want to read in both the Mac and Windows? It works in Windows but when you insert it in the old Mac, it asks you to initialize/format it? An USB stick? But what about an USB HARD DRIVE? Note that "USB stick" in this tutorial here can be replaced by ANY "USB drive" that you want, as long as it's backward compatible with USB 1.1 (e.g. USB 2.0 is OK, most USB 3.0 are also OK, but USB 3.1 and higher will be hit and miss because of power requirements and protocol changes). Why it fails All PowerPC Macs before Mac OS X support FAT32, HFS and HFS+ as USB drive volume (or "partition") formats. You say to yourself that all you have to do is to format your USB stick as FAT32 and off we go, right? But some people have trouble formatting their USB stick under Windows as FAT and then having it read by the old Mac. This is often because the newer USB sticks come from factory with a newer partiton scheme called GUID (or "GPT") instead of an older style MBR partition scheme. Using an old USB stick does not expose this issue, because all USB sticks made before 2015-ish all came from factory with a MBR style partition scheme. This is not the case anymore, as they generally come partitioned as GUID (or "GPT"). Old computers work with old technology and so, they require old partition schemes ;-) The secret of Monke... wait. First, in order to fix the issue, know that you do NOT need Mac OS X or any modern OS, but that it can be done with a modern computer too (not explained in this tutorial; look up how to convert a drive from GPT to MBR). So, the secret is to insert the USB stick in the Mac first, then initialize it as "DOS" (FAT). What this will do is 2 things: First, it will overwrite the partition scheme to MBR. Second, it will write a couple folders and files to the root of the drive so it can later store Mac files metadata.
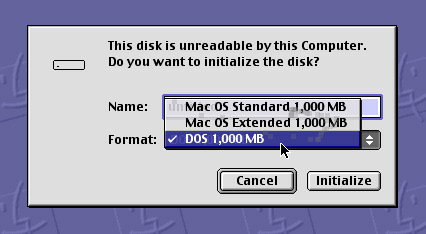
Detailed instructions: 1) Copy anything of value that you want to keep from the USB stick to your modern computer before going further, because we're going to start over and erase it all, the correct way. 2a) Plug the USB stick in the old Mac. It's highly suggested to use a root USB port, not the USB port on the side of the keyboard, because it often does not deliver enough power to properly drive modern USB sticks. If you do not see any dialog box when you plug in the USB stick and that it actually mounts correctly under Mac OS, but not under Windows, then it means that it's improperly formated as Macintosh HFS or HFS+ and both of those formats are NOT supported by Windows, so click the USB stick volume icon on the desktop, then in the menu bar at the top, choose FILE > ERASE DISK... and proceed with 2b) below. 2b) Once the USB stick is plugged in the PowerPC Mac, it will display a window asking you to initialize the drive. Select DOS (or FAT) in the FORMAT popup menu and hit INITIALIZE. It will display a "CREATING DIRECTORY" window for a very long while. Doing this over USB 1.1 is incredibly slow because older Mac OS does a FULL FORMAT (every sector of the drive). Depending on the USB stick size, be warned that this could take a VERY, VERY LONG TIME (e.g. 15 hours for a 32GB drive!). This is why I highly suggest that you use a smaller USB stick, like 1GB. Also, I confirm that you can cheat and unplug the USB stick after 30 seconds and that it seems to work just fine. Just reboot the old Mac afterwards to remove the phantom USB stick icon left on the desktop.
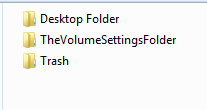
3) Once it's done, the volume will mount on the desktop. At this point, you can drag it to the trash to eject it and plug it in the Windows computer. You will notice that it mounts immediately under Windows and that it shows all the weird following directories. DO NOT DELETE OR RENAME THEM. They are what makes old Mac OS compatible with the FAT partition format. You may hide those files in Windows though, this will not hurt anything and will make you less susceptible to swearing.
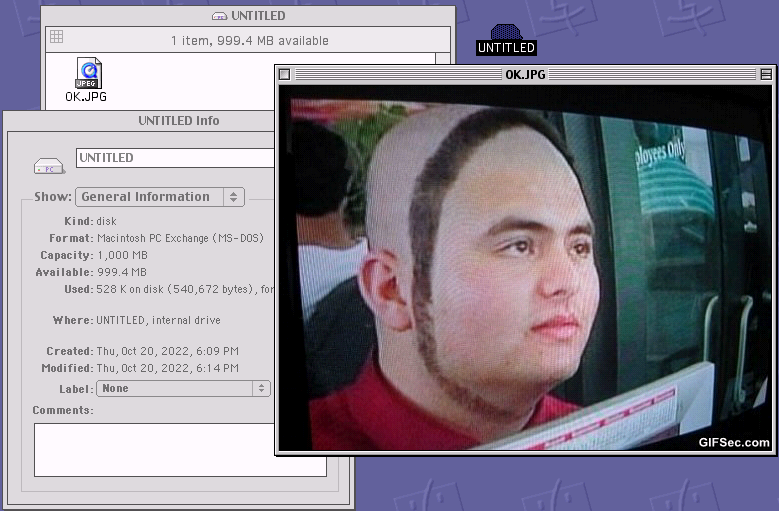
4) You can use the USB stick to copy any binary safe file (basically anything that you download from the MR website) such as: .sit, .zip, .hqx, .bin, .cpt, .iso, .toast, etc... onto the Mac. Please understand that you CANNOT expand archives (such as .sit) directly from a FAT volume, so once you plug the USB stick in the old Mac, you first need to copy the files onto the internal Mac's hard drive before using/expanding them, otherwise you will run into errors, since old Mac applications need to store essential resources in a resource fork that is unavailable on a FAT partition, so anything that you expand onto a FAT partition will essentially be lacking half of each file! So copy the .sit files onto the hard drive, then expand them from there. JPEG and other non-Mac files can be opened directly from a FAT volume, no problem:
Hope you found the tutorial useful. If so, then hop in the public chat and say thanks. Bye for now!
|
|